
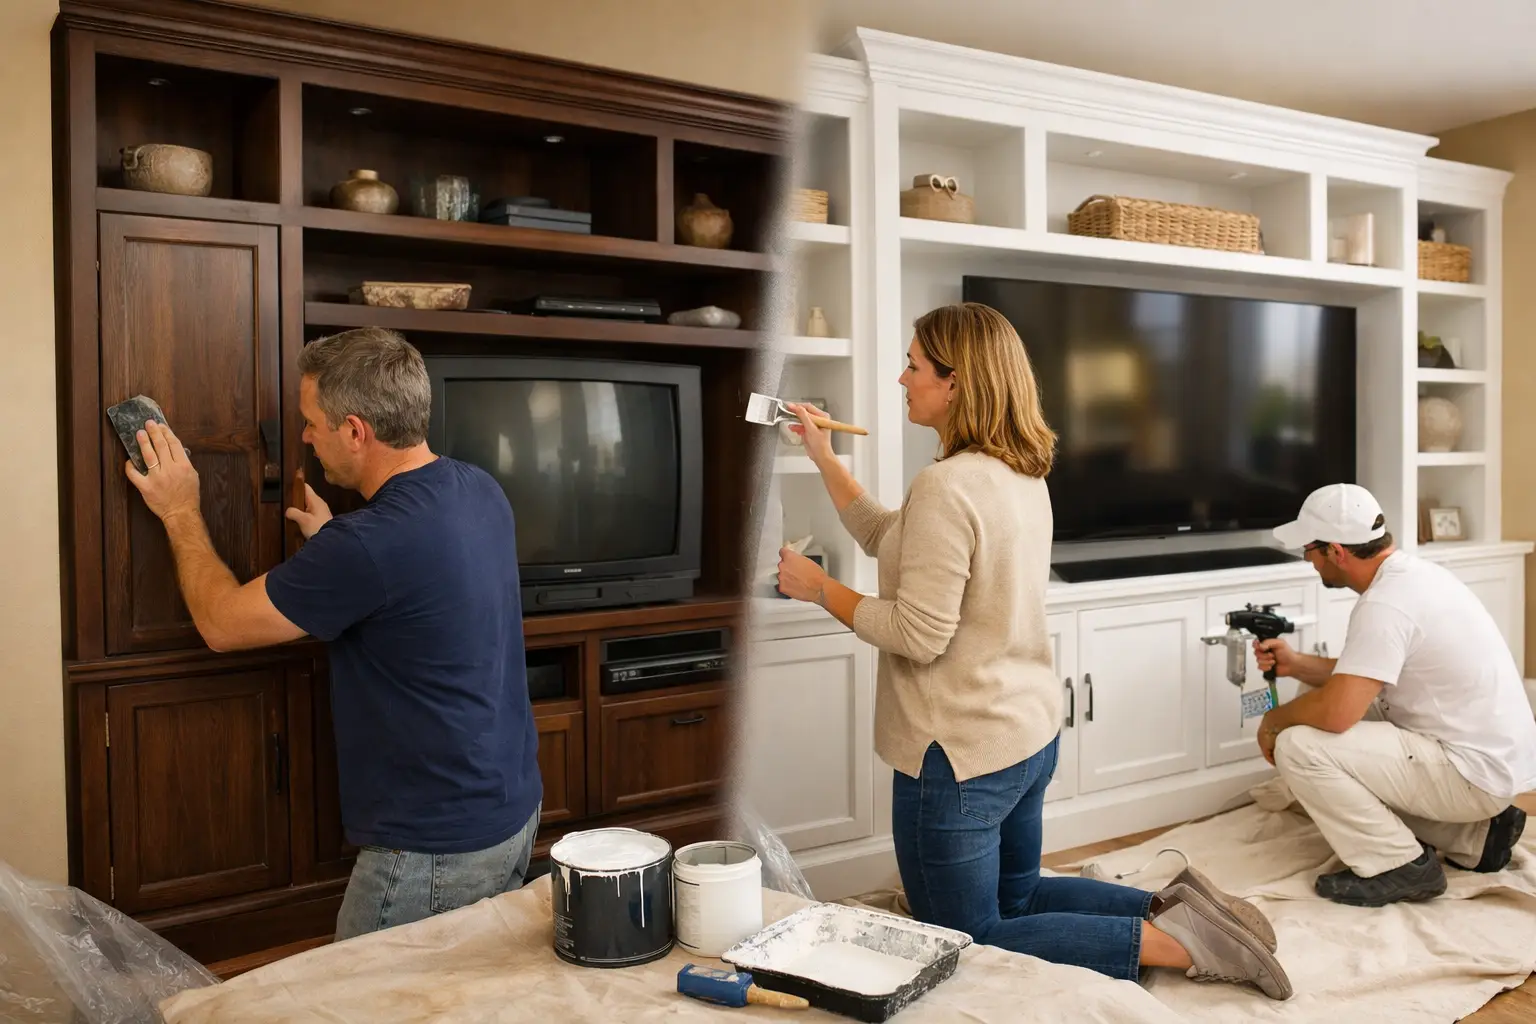
A large entertainment center can make a room feel dated long before the rest of the furniture does. In this entertainment center refinishing example project, an oversized built-in with worn wood stain is updated into a cleaner, more intentional focal point without removing the unit or paying for a full replacement.
The goal is not to make the piece look newly manufactured. It is to give solid, usable cabinetry a finish that fits the home now: smoother surfaces, a more current color, repaired details, and a durable coating that stands up to daily use. For homeowners weighing a major media-room update, refinishing often delivers the visual change they want while keeping the project budget under control.
The Starting Point: A Solid Piece With a Dated Finish
This representative project begins with a wall-to-wall entertainment center built from a mix of wood doors, trim, shelving, and veneered cabinet boxes. The layout works well. It has closed storage for electronics and games, open shelving for display pieces, and a central television opening. Replacing it would mean demolition, new cabinetry, electrical adjustments, and potentially drywall repair.
The real issue is the finish. The original dark reddish-brown stain makes the room feel heavy, while light scratches around the cabinet pulls and lower doors draw attention. A few trim joints have opened slightly over time. The surface is not beyond saving, but it needs more than a quick coat of paint.
That distinction matters. Professional refinishing is based on preparation. Paint applied over glossy, dirty, or damaged cabinetry may look acceptable on day one, then chip, peel, or show every imperfection once the room gets regular use.
Planning the Entertainment Center Refinishing Project
Before choosing a color, the first step is evaluating the materials and condition of the unit. Solid wood, wood veneer, laminate, and MDF can often be refinished, but each surface requires a different preparation approach. Veneer, for example, needs careful sanding to avoid sanding through the thin wood layer. Laminate needs the right bonding products and thorough cleaning so the coating can adhere.
For this project, the existing cabinetry is structurally sound. The doors open and close properly, the shelves are stable, and there is no water damage or major delamination. That makes refinishing a practical investment. If cabinet boxes are swollen, failing, or poorly configured for the homeowner’s needs, replacement may make more sense. A good finish improves sound cabinetry, but it cannot correct every structural problem.
The homeowner chooses a warm off-white for the main cabinetry. This gives the built-in a lighter look without the starkness of bright white. The interior back panels of the open shelves are finished in a muted charcoal tone to create contrast around books, artwork, and media equipment. The result feels custom because the colors work with the room’s flooring and wall paint rather than competing with them.
Hardware is also part of the plan. Replacing dated knobs with simple brushed metal pulls gives the doors a more current profile. Existing hole placement is checked before hardware is selected. Choosing pulls that fit the original spacing avoids unnecessary filling and drilling, though those repairs can be made when a completely different hardware style is preferred.
Prep Work That Determines the Final Result
The transformation begins with protecting the room. Floors, nearby furniture, and surrounding walls are carefully covered and masked. Doors, drawers, and removable hardware are taken off when appropriate so edges and faces can receive more consistent coverage.
Then comes the less glamorous but essential work: cleaning, degreasing, repairing, sanding, and priming. Entertainment centers collect dust around electronics, fingerprints near cabinet doors, and residue from household cleaning products. Those contaminants can interfere with adhesion, so the surfaces must be cleaned thoroughly before any finish work begins.
Small dents, scratches, old hardware holes, and open seams are repaired with materials suited to the surface. In this example, minor gaps at the decorative trim are filled and smoothed. A shallow scratch on one lower cabinet door is leveled so it will not remain visible under the new paint.
Next, the surfaces are sanded to remove gloss and create the right profile for the coating system. This is not about aggressively stripping every piece down to bare wood. It is about creating a smooth, stable base. Areas that need additional attention receive it, while delicate veneer and detailed trim are handled carefully.
A quality bonding primer follows. Primer helps block uneven color, improves adhesion, and creates a uniform surface for the final color. Skipping this stage is one of the most common reasons a painted entertainment center ends up looking uneven or wearing prematurely.
Applying a Finish Built for Everyday Living
Once the primer has cured and been lightly sanded as needed, the color coats are applied in controlled, even layers. A professional-grade sprayed finish is often the best choice for doors and larger flat panels because it produces a smooth appearance without heavy brush marks. Detailed trim and fixed sections may require a combination of application methods to ensure complete, clean coverage.
For the off-white cabinet color, several thin coats build opacity and durability without burying the door details. The charcoal shelf backs receive the same level of care. Contrast finishes can make a built-in look more dimensional, but they also reveal uneven edges quickly. Clean masking and steady application are what make the design feel polished rather than pieced together.
The sheen is chosen for both appearance and maintenance. A soft satin finish is a strong fit for this type of project. It reflects enough light to make the color feel fresh, yet it does not show every fingerprint as readily as a high-gloss coating. Matte finishes can look beautiful, especially in low-traffic display areas, but they may be less forgiving around frequently touched cabinet doors.
After the finish has cured appropriately, the doors and hardware are reinstalled. Shelves are cleaned, electronics are returned, and cords are organized so the updated cabinetry is not overshadowed by visible clutter. The end result is a built-in that looks lighter, cleaner, and more connected to the rest of the room.
What Changed Without Replacing the Built-In
The biggest change in this example is visual weight. The former dark wood finish absorbed light and made the large cabinet wall feel dominant. The warm off-white color brightens the room and lets the television, decor, and shelving blend into a more balanced design.
Refinishing also improves the small details homeowners notice every day. Repaired door faces look smoother. Updated hardware feels better in the hand. A consistent finish across trim, doors, and cabinet boxes replaces the uneven look caused by age, scratches, and fading.
The project does have trade-offs. Refinishing preserves the original layout, so it will not add more storage or create space for a much larger television unless modifications are included. It also requires cure time. Cabinetry may look dry before the finish has fully hardened, so homeowners should follow care guidance and avoid putting the surface through heavy use too soon.
Still, when the layout is functional and the materials are sound, refinishing can be a smart middle ground. It gives homeowners a high-impact update without the cost, disruption, and waste of tearing out cabinetry that still has years of service left.
Color and Finish Ideas for Your Own Built-In
A painted off-white built-in is one option, not the only option. A deep navy or charcoal finish can make an entertainment center feel tailored and dramatic, especially in a room with good natural light. Soft greige creates a quiet, versatile look that works with many wall colors. For homeowners who love real wood character, a refreshed stain can bring back warmth while reducing the orange or red undertones common in older finishes.
The right choice depends on the room’s lighting, flooring, wall color, and how the space is used. Dark colors can add depth but may make a large built-in feel more prominent. Light colors usually make the room feel more open, though they need a durable finish in high-touch areas. Two-tone designs are useful when you want contrast without committing the entire unit to a bold color.
For homeowners in Palm Desert, Palm Springs, Rancho Mirage, and surrounding Coachella Valley communities, an existing entertainment center does not have to remain a dated feature just because it is large. With proper repairs, thoughtful color selection, and professional finishing, it can become one of the room’s strongest design elements. A careful refinishing plan starts with what is worth preserving and turns it into something you will enjoy seeing every day.